Step-by-Step Guide: How to Make a Candle Wick
In the magical art of candle making, the candle wick plays a crucial role. It may seem small and insignificant, but without a proper wick, your beautiful candle won’t burn properly or last as long as it should. Understanding the importance of a candle wick and knowing how to make one will elevate your candle making skills and ensure that your creations shine brightly.
Understanding the Importance of a Candle Wick
Have you ever wondered why a candle needs a wick? It’s not just a mere string that holds the flame; it’s an essential component that allows the wax to burn, providing the light and ambiance we all love. The wick serves as a delivery system, drawing liquid wax from the candle’s reservoir and turning it into vapor that ignites and produces a beautiful, steady flame.
With this step-by-step guide how to make a candle wick you now have the knowledge and confidence to make your very own candle wick. Enjoy the process of crafting something unique and perfect for your candle creations. Happy candle making!
Without a wick, a candle would simply be a solid block of wax with no means of being transformed into a luminous source of light. The wick’s role is crucial in the process of combustion, where the wax is transformed into a gas that combines with oxygen to create a flame. This simple yet ingenious mechanism has been utilized for centuries to illuminate homes, create a cozy atmosphere, and even mark special occasions.
The Role of a Wick in Candle Making
When you light a candle, the heat of the flame melts the wax surrounding the wick. This melted wax is drawn up the wick, where the heat of the flame vaporizes the liquid wax, creating fuel for the fire. The wick needs to be the right size and composition to ensure that it can efficiently draw up the liquid wax and maintain a steady burn throughout the life of the candle.
Furthermore, the design of the wick can influence the characteristics of the candle, such as the size of the flame, the rate of wax consumption, and the overall burn time. Candle makers carefully select wicks based on these factors to achieve the desired performance and aesthetic appeal of their candles. It’s a delicate balance between art and science, where the choice of wick can make a significant difference in the candle’s quality.
Different Types of Candle Wicks
Candle wicks come in various types, each designed for specific candle types and purposes. Here are a few common types:
- Cotton wicks: These are the most commonly used wicks and work well with most types of candles.
- Wooden wicks: These unique wicks provide a lovely crackling sound and are ideal for soy or beeswax candles.
- Zinc core wicks: These wicks have a zinc core, providing rigidity and preventing mushrooming and carbon buildup.
- Paper wicks: Often used in tealight candles, paper wicks are efficient and cost-effective.
Read about 3 wick candle at: The Art of Making a 3 Wick Candle
Gathering Your Candle Wick Materials
Before you begin making your own candle wick, it’s essential to gather all the necessary materials. Having everything at hand will make the process seamless and enjoyable.
Creating your own candle wick can be a rewarding experience, allowing you to customize your candles to your liking. Whether you prefer a slow, steady burn or a brighter flame, the wick plays a crucial role in achieving the desired candle characteristics.
Essential Tools for Wick Making
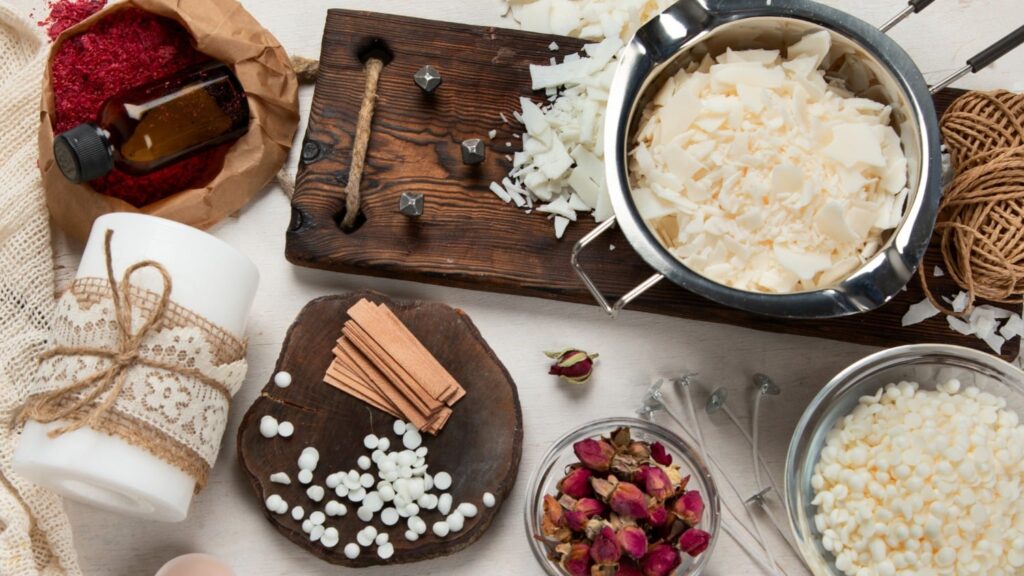
To make your candle wick, you’ll need a few tools:
- Wick material (cotton, wood, hemp, etc.)
- Scissors for cutting the wick to the desired length
- Ruler or measuring tape to ensure precision in wick sizing
- Wick tabs or sustainer clips to keep the wick in place
- Wick stickers or adhesive for securing the wick to the container
Additionally, having a dedicated workspace with good ventilation is important when working with candle-making materials to ensure safety and proper ventilation.
Choosing the Right Wick Material
When it comes to selecting the wick material for your candle, many variables come into play, such as the type and size of the candle, the type of wax, and the desired burn time. Experimentation is key here, but remember that a too-small wick will drown in wax, while a too-large wick will burn too fast and may create smoke. Cotton wicks are a great starting point for most candles, offering a clean burn and minimal soot. However, for specialty candles or unique effects, consider exploring wood or hemp wicks for a distinctive touch.
Each type of wick material has its own characteristics, affecting how the candle burns and the overall ambiance it creates. By understanding the properties of different wick materials, you can tailor your candle-making process to achieve the perfect result for your preferences. Learn more about burns on https://www.ncbi.nlm.nih.gov/pmc/articles/PMC7224101/
Preparing Your Wick Material
Now that you have your wick material and essential tools ready, it’s time to prepare your wick for making. This involves cutting the wick to the right length and treating it to enhance its burning performance.
Choosing the right wick material is crucial for a successful candle-making project. Cotton wicks are a popular choice due to their clean burn and minimal soot production. However, if you’re looking for a longer-lasting option, consider using a wooden wick for a unique crackling sound and aesthetic appeal.
Cutting Your Wick to the Right Length
Using a ruler or measuring tape, measure the appropriate length for your wick based on the height of your candle. Remember to add a little extra length for attaching the wick to the wick tab or sustainer clip. Once you’ve measured the desired length, use sharp scissors to make a clean, straight cut.
Ensuring your wick is the correct length is essential for a successful burn. A wick that is too short may drown in the wax, while a wick that is too long can cause smoking and uneven burning. Take your time to measure accurately for optimal results.
Treating Your Wick for Better Burning
Before we move on to the actual making of the wick, treating the material is essential for optimal burning performance. Soak the wick in a mixture of water and salt or borax for a few hours. This process will help to reduce ash buildup and provide a cleaner burn. After soaking, hang the wick to air dry completely.
Another method to enhance your wick’s burning capabilities is to prime it with wax. By gently dipping the wick in melted wax and allowing it to dry, you create a more stable and consistent flame. This extra step can improve the overall performance of your candle, ensuring a longer and cleaner burn. To find more about stable click here.
Making Your Candle Wick: A Step-by-Step Guide
Now we’re ready to dive into the exciting process of making your very own candle wick. Follow these step-by-step instructions, and you’ll soon have a beautifully crafted wick ready to be used.
Step 1: Preparing Your Materials
Ensure that you have all the necessary materials within reach, including the wick material, scissors, wick tabs, wick stickers, and any other tools you may need. Having everything organized and easily accessible will make the process much smoother.
Step 2: Braiding or Twisting Your Wick
If you’re using cotton wick material, this step involves braiding the strands together. Alternatively, if you’re working with wooden wicks or other types of materials, twisting the individual strands tightly together will create a stable wick. Make sure the braid or twist is tight enough to hold its shape but not so tight that it compromises the wick’s flexibility.
Step 3: Treating Your Wick
Remember when we soaked the wick earlier to remove impurities and enhance burning? Now is the time to apply any additional treatments if desired. You can dip the wick in melted wax or use natural additives like beeswax or vegetable oil to give it a more robust structure and improve its combustion properties. This step is optional but can lead to better overall performance.
Step 4: Drying and Testing Your Wick
After treating the wick, let it air dry completely. Once dry, it’s crucial to test the wick before using it in a candle. Burn a small section of the wick and observe its burn rate, flame size, and stability. Make adjustments as needed until you achieve the desired results.
Now that you’ve successfully completed the four main steps of making your candle wick, let’s delve into some additional tips and tricks to take your wick-making skills to the next level.
Firstly, consider experimenting with different wick materials to achieve various effects. For example, using a thicker cotton wick will create a larger flame, perfect for larger candles or outdoor use. On the other hand, a thinner wick may be more suitable for smaller candles or those with a delicate fragrance.
Secondly, don’t be afraid to get creative with your wick designs. While a simple braided or twisted wick is classic and reliable, you can also try incorporating decorative elements. For instance, you could add a colored thread or ribbon to the wick for a pop of visual interest. Just make sure any additional materials you use are flame-resistant and won’t interfere with the wick’s functionality.
Lastly, remember that practice makes perfect. Don’t be discouraged if your first few attempts at making a candle wick don’t turn out exactly as you envisioned. Keep refining your technique, experimenting with different materials and treatments, and soon you’ll be crafting professional-quality wicks that will enhance the beauty and performance of your homemade candles.
Troubleshooting Common Wick-Making Problems
Even with careful preparation, you may encounter some challenges along the way. Here are a couple of common wick-making problems and how to tackle them:
Why Isn’t My Wick Burning Properly?
If your wick is not burning as it should, it may be due to a few reasons. Ensure that the wick is the appropriate size for the candle’s diameter and that it has been treated correctly. Additionally, make sure the wick is properly centered in the candle to maximize its burn efficiency.
How to Fix a Wick That’s Too Short or Too Long
If you find that your wick is either too short or too long for your candle, don’t fret. For a too-short wick, carefully remove it from the candle and replace it with a longer one. Alternatively, for a too-long wick, trim it down to the appropriate length and relight. Remember, practice makes perfect, and experimentation is key to finding the ideal wick length for your specific candle.
Ensuring your wick burns properly is crucial for the overall performance of your candle. A well-burning wick not only provides a steady flame but also helps in achieving an even wax pool, ensuring maximum fragrance throw and a longer burn time for your candle.
Another factor to consider is the type of wax you are using in your candle-making process. Different waxes have varying melting points and characteristics that can affect how the wick burns. Soy wax, for example, tends to burn cooler than paraffin wax, so selecting the right wick for the specific wax type is essential for optimal performance.
