The Art of Making a 3 Wick Candle
Candle making is a centuries-old craft that combines science and art. The process of creating a 3 wick candle requires attention to detail and the right materials. In this article, we will explore the basics of candle making, the importance of using three wicks, and provide a step-by-step guide to making your own 3 wick candle. We will also discuss common troubleshooting issues that may arise and how to address them.
Understanding the Basics of Candle Making
Before diving into the world of 3 wick candles, it’s important to have a good grasp of the basics of candle making. These include understanding the essential materials required and the safety precautions that need to be followed.
Creating your own candles can be a rewarding and creative experience. Not only do you get to customize the scent and color of your candles, but you also have the satisfaction of knowing that you made them yourself. So, let’s delve into the world of candle making and explore the essential materials you’ll need to get started.
Essential Materials for Candle Making
To create a 3 wick candle, you will need the following materials:
- Wax – Choose a type of wax that is suitable for candle making. Common options include soy wax, beeswax, and paraffin wax. Each type of wax has its own unique characteristics, so it’s worth experimenting to find the one that suits your preferences.
- Wicks – Ensure that you have three wicks that are suitable for the size of your candle vessel. The wick is an essential component of a candle as it provides the fuel for the flame. It’s important to choose the right size wick to ensure a clean and even burn.
- Candle Vessel – Select a vessel that can accommodate three wicks. Glass containers are often used for 3 wick candles as they allow the beautiful glow of the flame to shine through. However, you can also get creative and use other materials such as ceramic or metal.
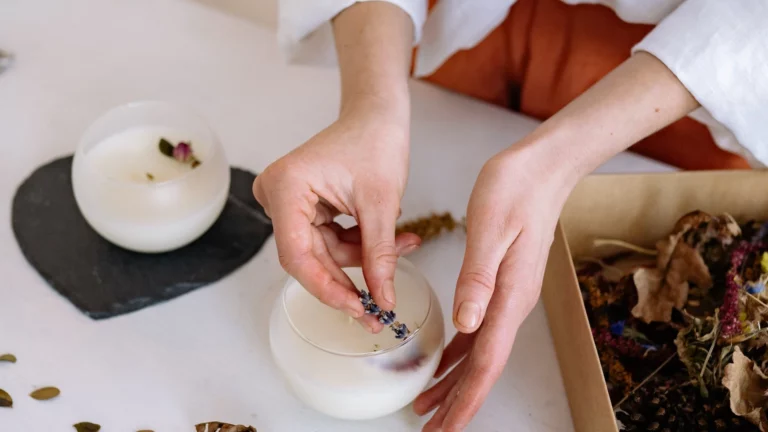
- Fragrance or Essential Oils – If desired, you can add fragrance or essential oils to your candle to create a pleasant scent. Whether you prefer the soothing aroma of lavender or the invigorating scent of citrus, there are endless options to choose from. Just make sure to use oils specifically designed for candle making to ensure a safe and long-lasting fragrance.
- Dye – If you prefer a colored candle, you can add dye to the melted wax. From vibrant blues to soft pastels, the choice of colors is entirely up to you. Experiment with different shades and combinations to create candles that match your personal style or the theme of a special occasion.
- Thermometer – A thermometer will help you monitor the temperature of the wax during the melting process. Maintaining the correct temperature is crucial for achieving a smooth and even burn. Different types of wax have different melting points, so it’s important to follow the recommended temperature range for the specific wax you are using.
- Pouring Pot – A pouring pot will make it easier to pour the melted wax into the candle vessel. Look for a pot with a spout for precise pouring and a heat-resistant handle for safe handling. You can also repurpose an old metal container as long as it’s heat-resistant and can withstand the melting wax.
- Heat Source – You will need a heat source, such as a stove or hot plate, to melt the wax. It’s important to choose a heat source that is suitable for the size of your melting pot and can provide a consistent and controlled heat. Always follow the manufacturer’s instructions for the specific heat source you are using.
- Heat-resistant Surface – Make sure to work on a heat-resistant surface to protect your workspace. A silicone mat or a metal tray can provide a safe and easy-to-clean surface for your candle making endeavors. Avoid working on surfaces that can be damaged by heat or are highly flammable.
Safety Precautions in Candle Making
When making candles, safety should always be a top priority. Follow these safety precautions to prevent accidents and ensure a successful candle making experience:
- Work in a well-ventilated area to avoid inhaling fumes from the melting wax. Proper ventilation is essential for maintaining a safe and comfortable working environment.
- Keep flammable materials away from the heat source. It’s important to create a clear and clutter-free workspace to minimize the risk of accidental fires.
- Use oven mitts or heat-resistant gloves when handling hot materials. Wax can reach high temperatures, and it’s crucial to protect your hands from burns or injuries. Find more about heat-resistant at https://news.engin.umich.edu/2022/09/heat-resistant-nanophotonic-material-could-help-turn-heat-into-electricity/
- Never leave melting wax unattended. It’s easy to get caught up in the excitement of candle making, but it’s important to always keep an eye on the melting wax to prevent any mishaps.
- Follow the manufacturer’s instructions for the specific wax and wicks you are using. Different types of wax and wicks have different requirements, so it’s essential to read and follow the guidelines provided by the manufacturers to ensure a safe and successful candle making process.
By understanding the basics of candle making and following the necessary precautions, you can embark on a creative journey that will fill your space with beautiful and fragrant 3 wick candles. So, gather your materials, put on your safety gear, and let your creativity shine!
To read about how to make candle wicks click here.
The Importance of Using Three Wicks
Now that you understand the basics of candle making, let’s explore why using three wicks in a single candle can be beneficial.
The Science Behind Three Wicks
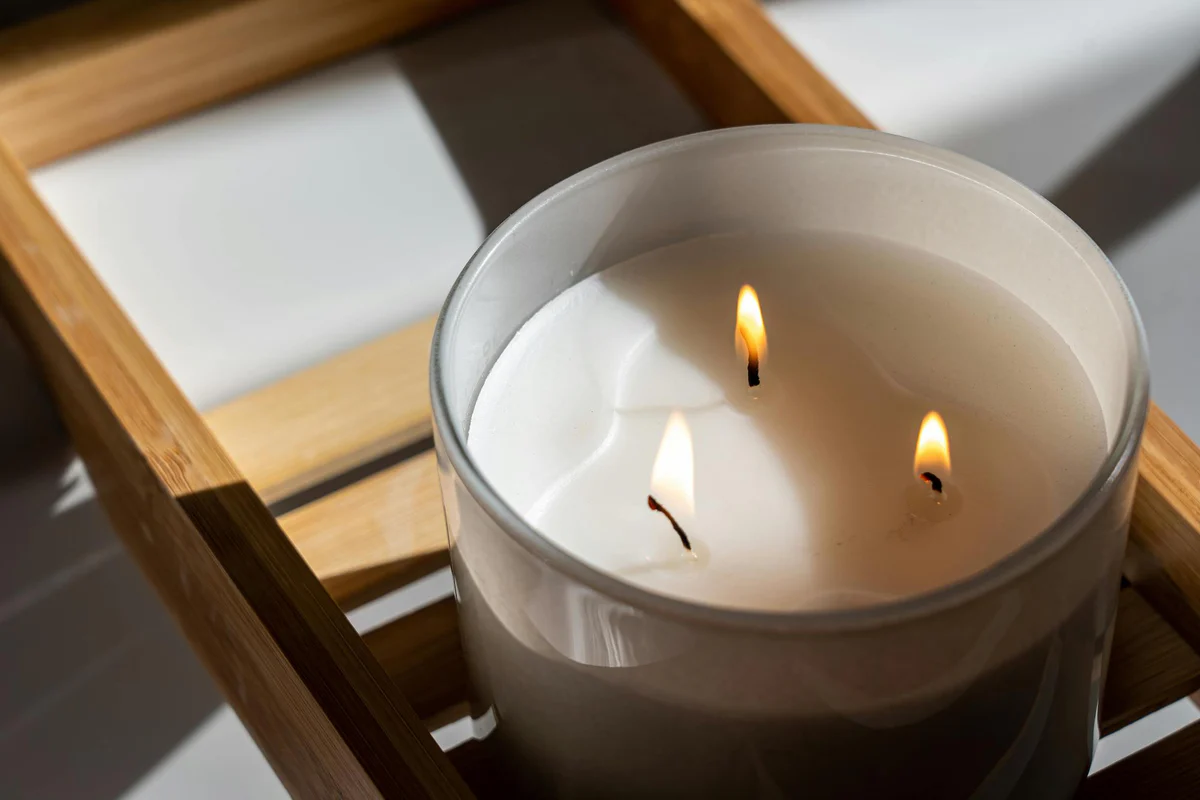
Three wick candles offer several advantages over their single wick counterparts. The positioning of the wicks in different locations in the candle allows for a more even distribution of heat. This results in a more even burn, preventing issues such as tunnelling and wax pooling.
Moreover, the use of three wicks in a candle can also contribute to a more aesthetically pleasing experience. As the three flames dance and flicker in unison, they create a mesmerizing visual display that adds a touch of elegance and charm to any room.
Benefits of a 3 Wick Candle
In addition to a more even burn, using three wicks can also enhance the fragrance throw of a candle. The three wicks help distribute the scent throughout the space more effectively, providing a stronger and longer-lasting fragrance experience. This makes 3 wick candles a popular choice for those who enjoy filling their homes with delightful scents.
Furthermore, the use of three wicks in a candle can extend its overall burn time. By having multiple wicks burning simultaneously, the candle wax is consumed at a faster rate, allowing you to enjoy the warm glow and comforting ambiance of the candle for an extended period.
Step-by-Step Guide to Making a 3 Wick Candle
Ready to unleash your creativity and make your own 3 wick candle? Follow this step-by-step guide to get started.
Preparing Your Workspace
First, gather all the necessary materials and ensure your workspace is clean and well-organized. This will help you stay focused and prevent any accidents or mishaps along the way. Lay down a heat-resistant surface, such as a silicone mat or aluminum foil, to protect your work area from any potential wax spills. It’s always better to be safe than sorry!
Assembling Your Materials
Measure and cut your wicks according to the height of your candle vessel. It’s important to have the right length to ensure that your wicks burn evenly. Attach the wicks to the bottom of the vessel using a suitable adhesive, such as hot glue. Make sure the wicks are centered and taut, as this will help them stay in place during the pouring process. Take your time with this step to ensure a sturdy foundation for your candle. Click here to read more about adhesive.
Setting Up Your Wicks
Once the wicks are securely attached to the vessel, it’s time to set them up for pouring. Take a pencil or a chopstick and place it across the top of the vessel. Gently wind the wicks around the pencil or chopstick, making sure they are taut and straight. This step is crucial as it will prevent the wicks from moving or leaning to one side when you pour the melted wax. A little extra effort now will result in a beautifully centered candle later.

Melting and Pouring the Wax
Using a double boiler or a pouring pot placed in a boiling pot of water, melt the wax on low to medium heat. Stir occasionally to ensure even melting and use a thermometer to monitor the temperature. It’s important to maintain a safe temperature range to prevent the wax from overheating or burning. Once the wax has melted, remove it from the heat source and let it cool slightly. This will ensure that the fragrance or essential oils you add later won’t evaporate too quickly.
Add fragrance or essential oils, if desired, and stir gently to ensure even distribution. This is your chance to customize the scent of your candle and make it truly unique. Experiment with different combinations and ratios to find the perfect aroma that suits your preferences. If you want a colored candle, add a small amount of dye and mix well. Remember, a little goes a long way when it comes to coloring wax, so start with a small amount and add more if needed.
Slowly and carefully pour the melted wax into the candle vessel, ensuring that all three wicks are immersed and centered. Take your time with this step to avoid any spills or splashes. It’s important to pour the wax slowly to prevent air bubbles from forming and to achieve a smooth and even finish. Allow the wax to cool and solidify completely before moving on to the next step. Patience is key when it comes to candle making!
Finishing Your Candle
Once the wax has fully solidified, it’s time to put the finishing touches on your candle. Trim the wicks to a suitable length, leaving about ¼ inch above the surface of the wax. This will help ensure a clean and even burn each time you light your candle. Use a sharp pair of scissors or wick trimmers for a precise cut. It’s important to regularly trim the wicks to prevent excessive smoking and to maintain a safe burning environment.
Now, your 3 wick candle is ready to be enjoyed! Light all three wicks simultaneously for a beautiful and fragrant ambiance. Sit back, relax, and let the warm glow and captivating scent of your handmade creation fill the room. Candle making is not only a creative outlet but also a therapeutic and rewarding experience. So go ahead, embrace your inner candle maker and let your imagination shine!
Troubleshooting Common Issues in 3 Wick Candle Making
While making 3 wick candles, you may encounter some common issues. Here are a few troubleshooting tips to help you address them:
Fixing Uneven Burning
If you notice that your 3 wick candle is burning unevenly, try trimming the wicks to a shorter length. Uneven wick lengths can cause uneven burning. Additionally, make sure that the wicks are properly centered in the candle vessel.
Dealing with Wick Submersion
If one or more of your wicks become submerged in wax while burning, carefully remove any excess wax using tweezers. This will help ensure a steady flame and prevent excessive smoking.
Addressing Tunneling Issues
Tunneling occurs when a candle burns down the middle, leaving a ring of unburned wax around the edges. To prevent tunneling, allow the candle to burn long enough during each use to allow the entire top layer to melt. This will promote an even burn and prevent wastage.
With these troubleshooting tips and a bit of practice, you’ll soon become a master in the art of making 3 wick candles. Enjoy the process and embrace the creativity that candle making brings.